
1. Start a new process
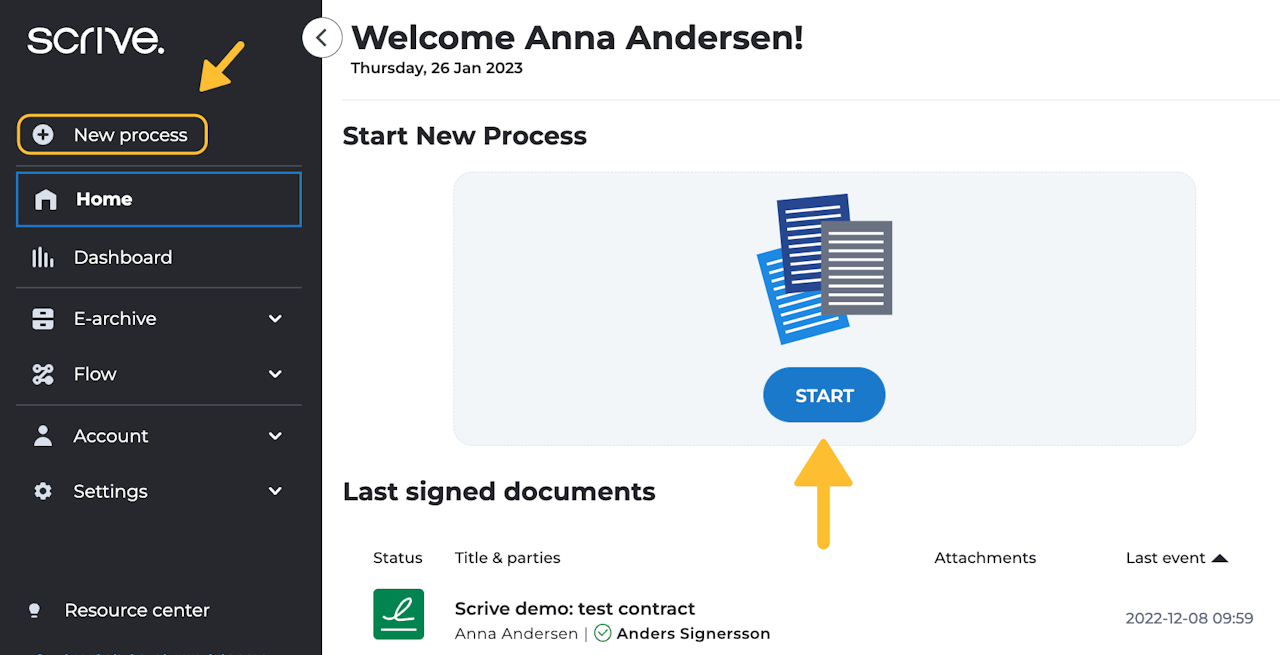
Starting a new process is easy. Just press the blue start-button on your home page, or navigate to 'New process' from the main menu to your left.

2. Add & edit parties
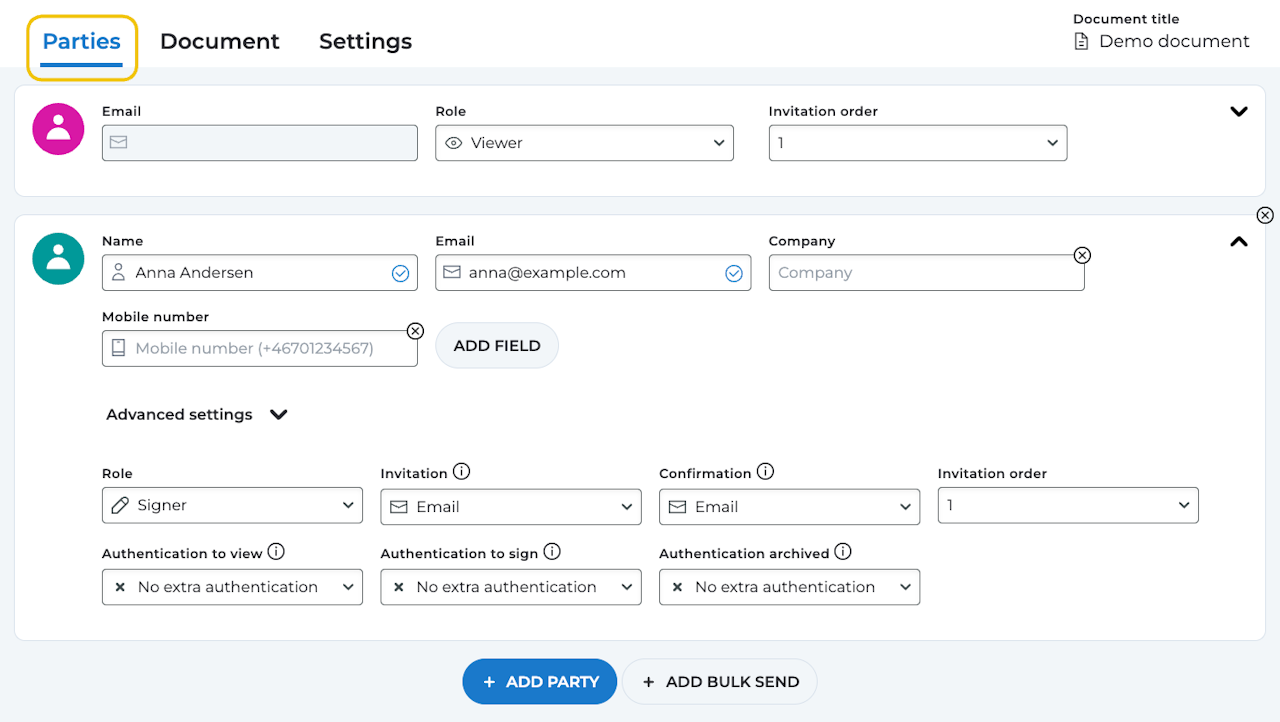
Under the 'Parties' tab, you can add and edit information for the participants of your signing process. The first party is automatically set as you, the initiator, with details mirrored from your Scrive account.
To add more parties, click on the blue 'Add party' button. Click on a party to edit their details and settings, for example:

3. Upload document
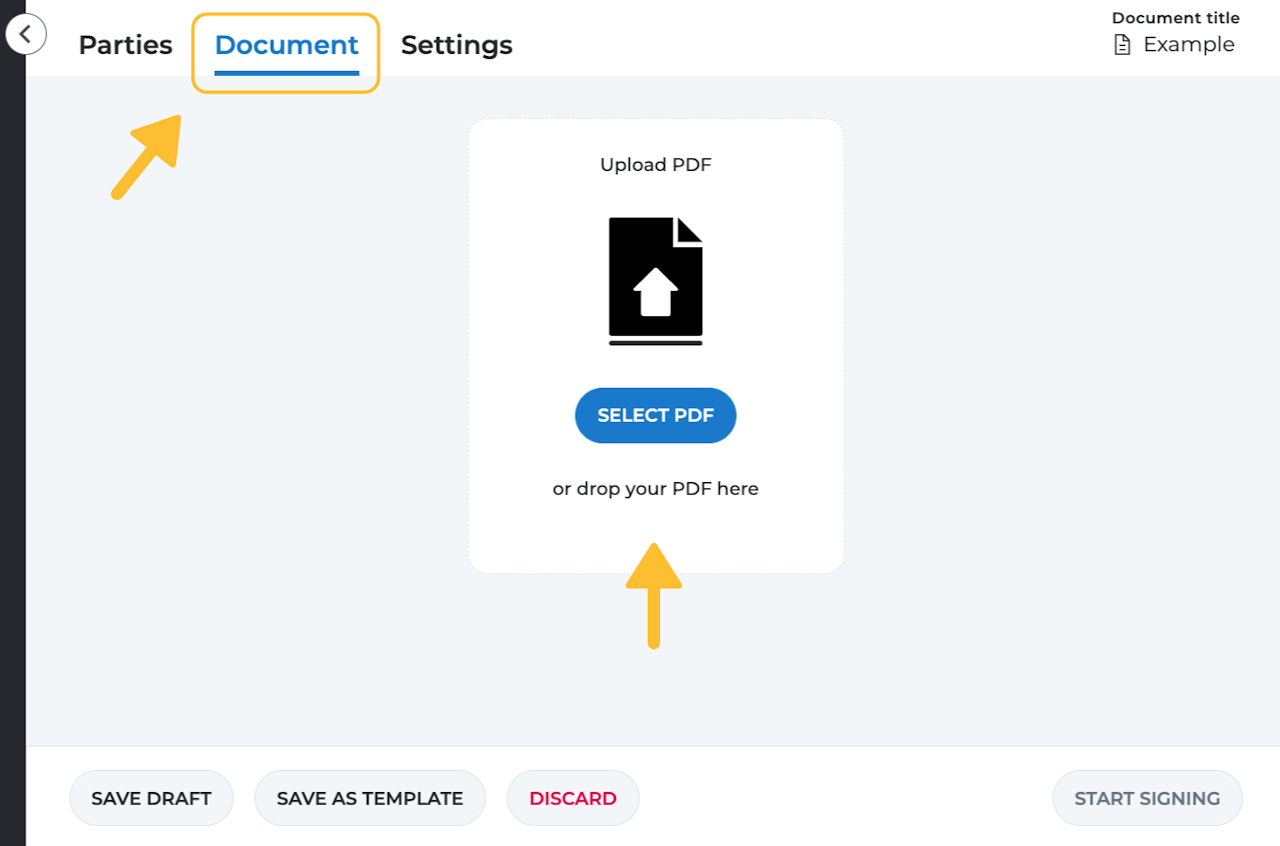
On the second tab, 'Document', upload the PDF you wish to be signed. Click on 'Select PDF' or drop your file into the box to upload.
Once you have uploaded your document, you have the option to add fields to it where either you or another party can fill in additional information.

4. Optional settings
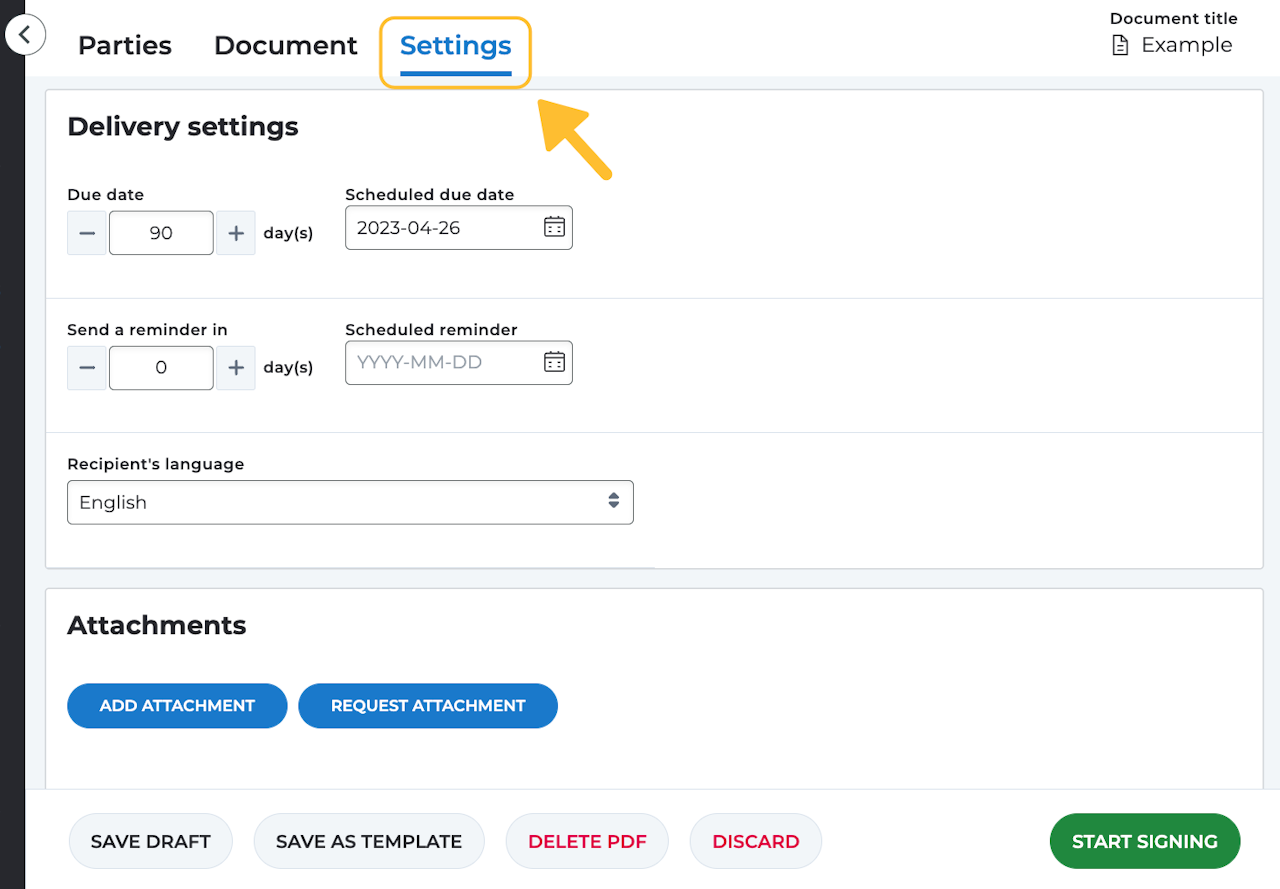
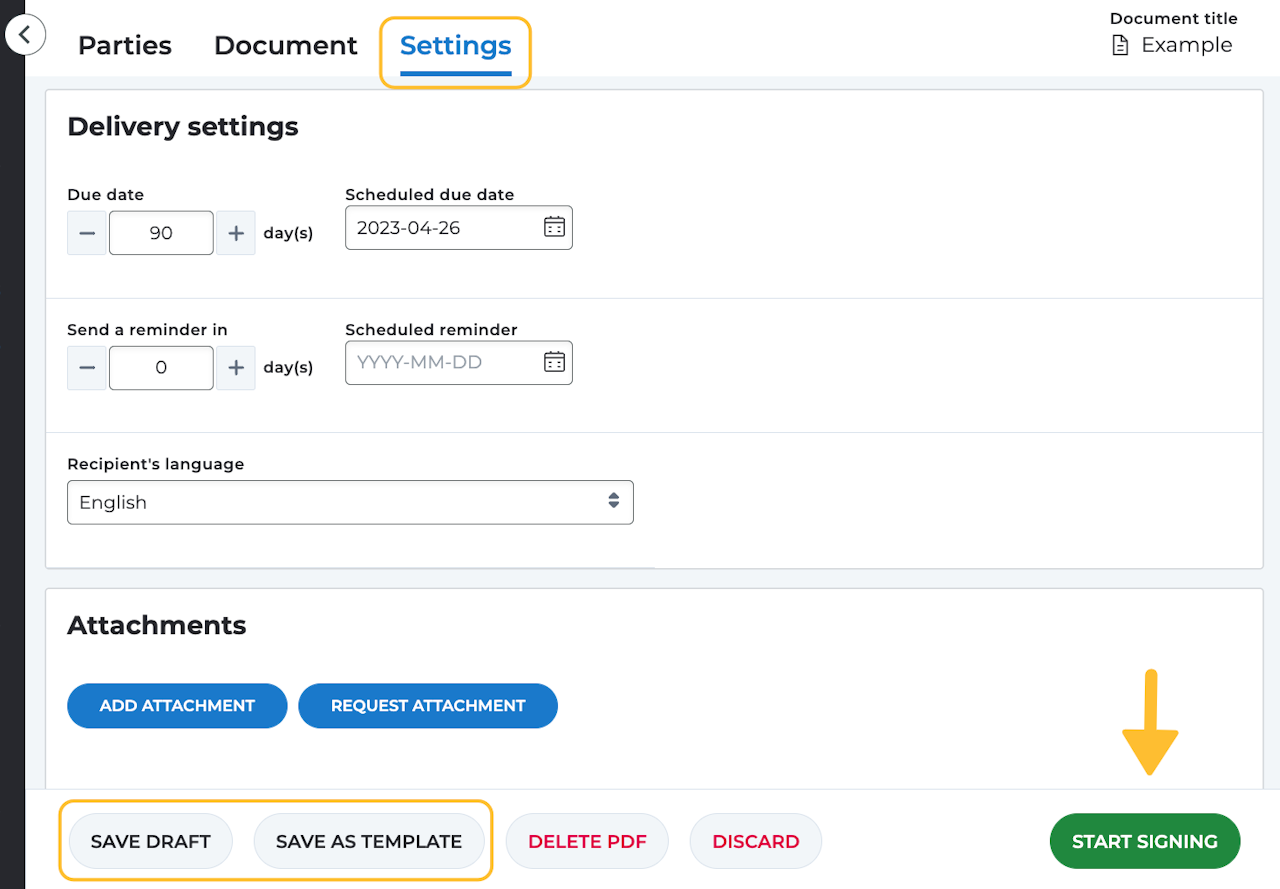
On the third and final tab, 'Settings', you have the option to customise your signing process with a number of additional settings, all of which are optional:

5. Start signing and send invitations
Once you are satisfied with your settings and have added the necessary elements, including invitation details for all parties and an uploaded PDF, the 'Start signing' button in the lower right will turn green. Click on it when you're ready to send out the document invitations.
A confirmation dialog will appear, allowing you to double-check the details you've added before proceeding to sign and send the document—or just send it if you haven't added yourself as a signing party.

6. Document status
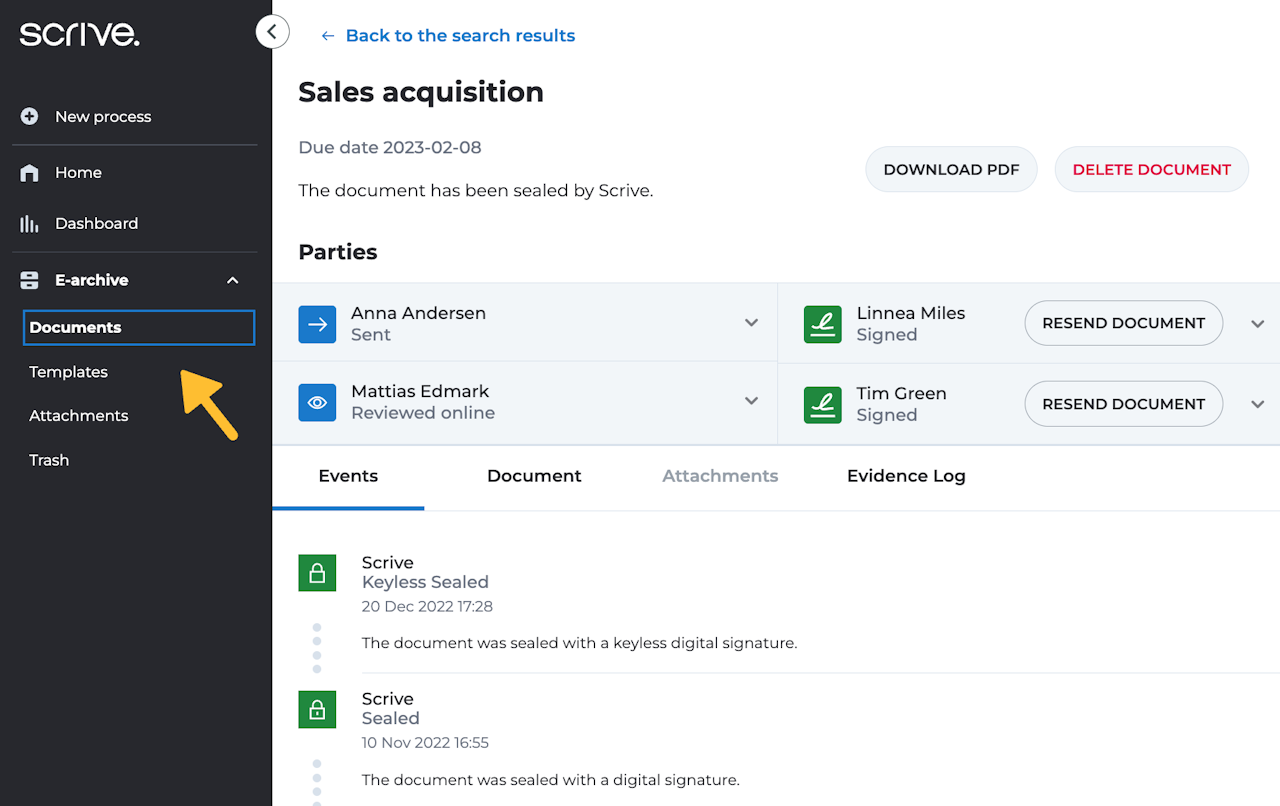
Once your document is sent out, you will be redirected to the process page. Here, you can track status updates for document events, such as when a party receives an invitation, opens it, views the document and signs it.
Additionally, from the process page, you can:
After the document has been signed by all parties, you will be able to download the sealed document and access the Evidence log. To revisit the process page at a later time, simply open the document through your E-archive in the main menu.


