

Adding a new user
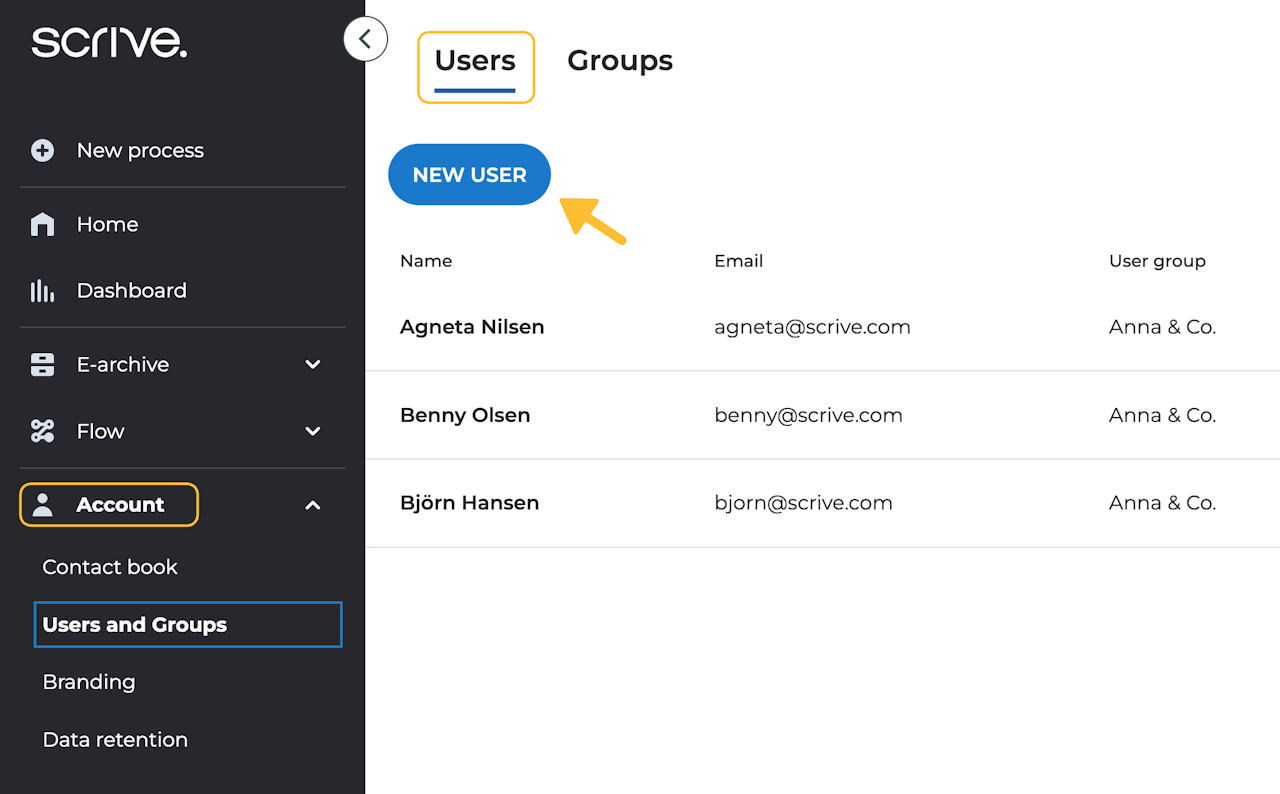
Navigate to 'Account' and 'Users and Groups' through the main menu.
Click 'New user'.
Enter the new user's details. The user can edit these details later if needed.
Click here for detailed information on user roles.
The language setting applies to both the user's account and the invitation email.
Click 'Invite'.
The new user will receive an email with an account activation link.
Inviting a SSO user:
If your user group is set up for SSO, no activation email will be sent. Instead, follow your company's internal process to inform the user of their account creation.

Revoke user invitation
Should the need arise to cancel/revoke a user invitation, follow these steps:
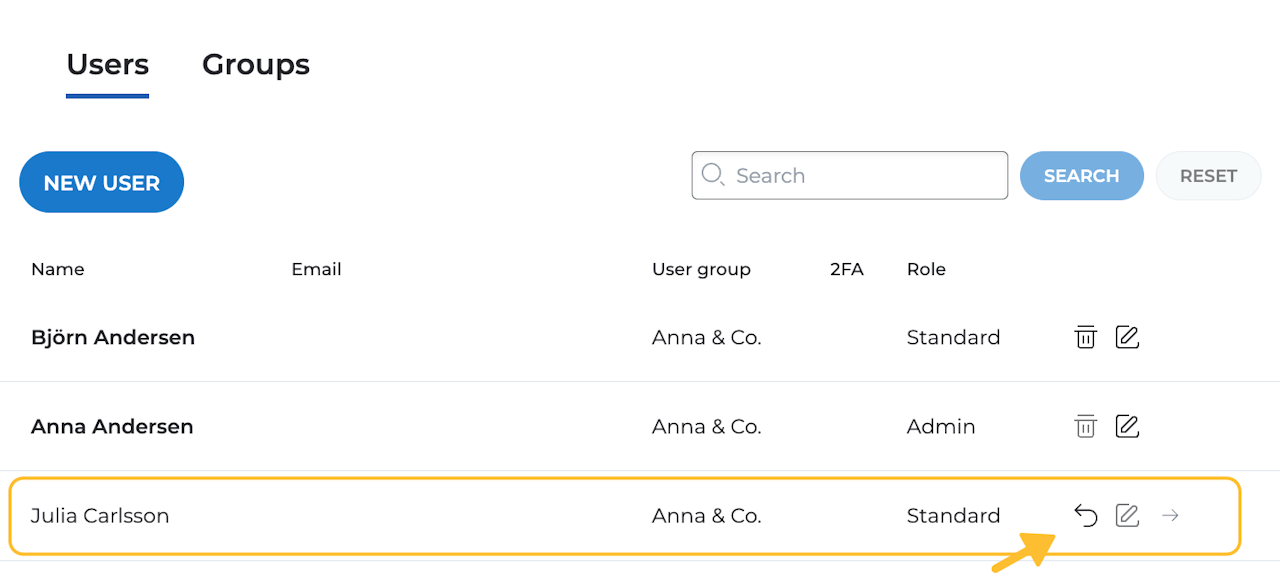
Navigate to the 'Users' page under 'Users and Groups' through the main menu under 'Account'.
Locate the user's name in the list and click on the revoke icon next to it.
The activation link included in the invitation email will now automatically expire. Once expired, it can no longer be used to log in at Scrive.

User invitation limit
To ensure efficient and secure user management, there are rate limits which are based on the price plan you have for sending user invitations. These limits apply to inviting new users and handling account takeovers for individuals outside your own user group.
For Essential, Business and Enterprise accounts:
|
For eSign API users with a Starter+ account:
|

Add multiple users
If you need to add multiple users at once, follow these steps:
Contact your Scrive representative for assistance with this process.
Prepare a CSV file with the following headers and user details:
"first_name" – user's name
"second_name" – user's surname
"email" – user's email
"lang" – user language (e.g., "en")
"role" – user role setting ("role_admin", "role_account_admin", or "role_standard")
Optionally, you can include an additional header:
"auth" – sets the login method (either "sso" for Single Sign-On or "native" for password login). If omitted, the default login method for the user group will be used.
