

Adding a Date field to a document
A date field can be included in a document to display a pre-specified date or allow the signatory to input a date. If needed, you can set an allowed date range for selection.
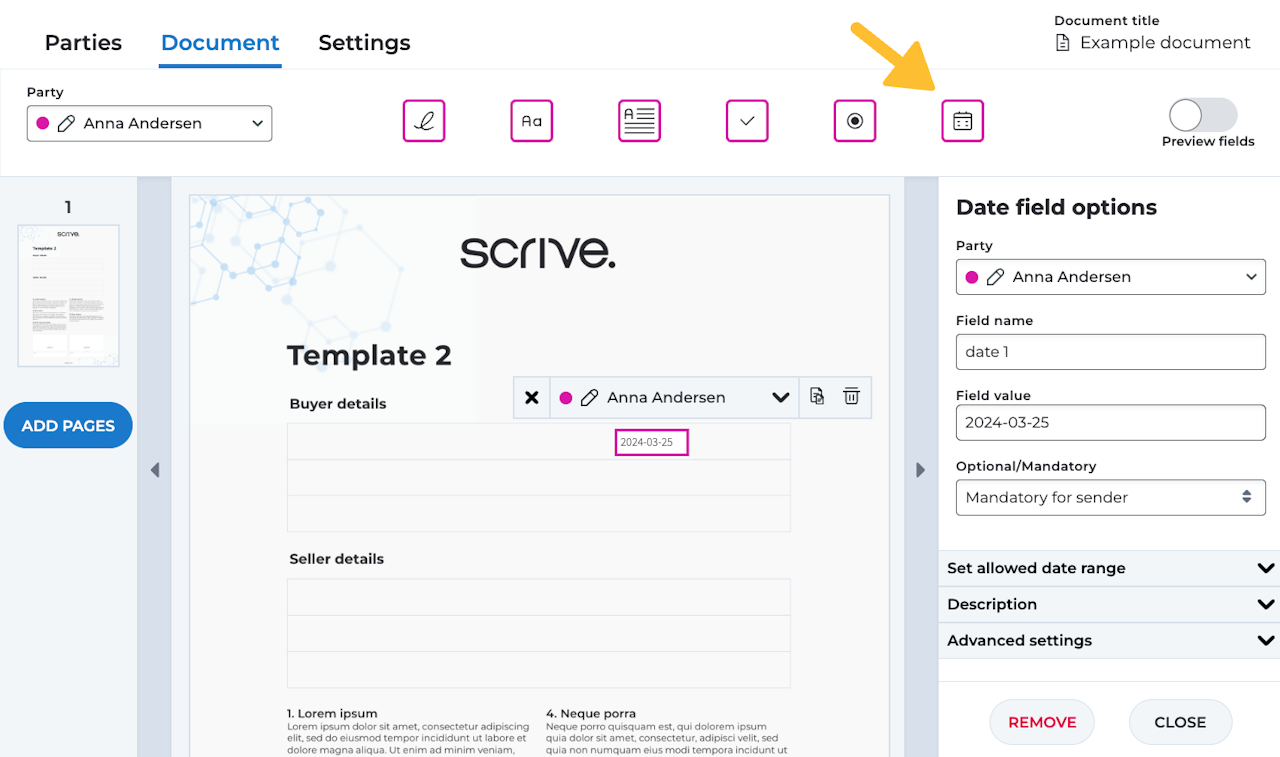
To add a date field:
Upload a PDF under the Document tab.
Click on the Date field icon.
Move the field by dragging it to the desired location.

Date field settings
Party: Determine which party should populate this field.
Field name: Customise the displayed name for the field.
Field value: This is where you enter the date. Leave it empty if it should be filled in by another party.
Optional/Mandatory:
Optional: Completing this field is not required.
Mandatory for sender: You, as the initiator of the process, must provide data for this field before sending the document.
Mandatory for recipient: The selected party must complete this field to complete the signing.
Set allowed date range: Pre-set an allowed time period during which the party can choose a date between specific start and end dates.
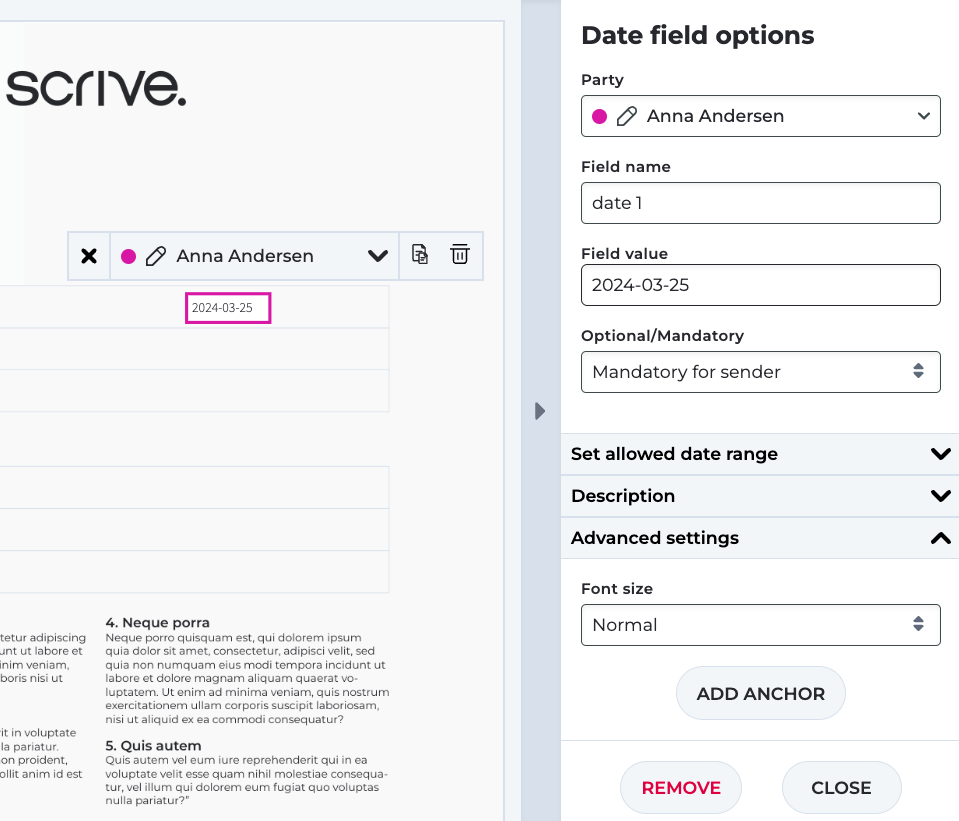
Additional settings:
Set allowed date range: Choose set a limitation between what dates the signer can pick a date.
Description (only visible if you have enabled the form on the Settings tab): Add some background info or guidelines to the signing party.
Font size (Advanced settings): Customise the size of the displayed date.
Add anchor (Advanced settings): Dynamically position the field based on its relation to a text string.
