

Adding a Text field to a document
A text field serves the dual purpose of gathering information from a party and including additional details within a designated box in a document.
Creating a new custom text field in the document will result in the same field appearing under the relevant party on the Parties tab.
To add a text field:
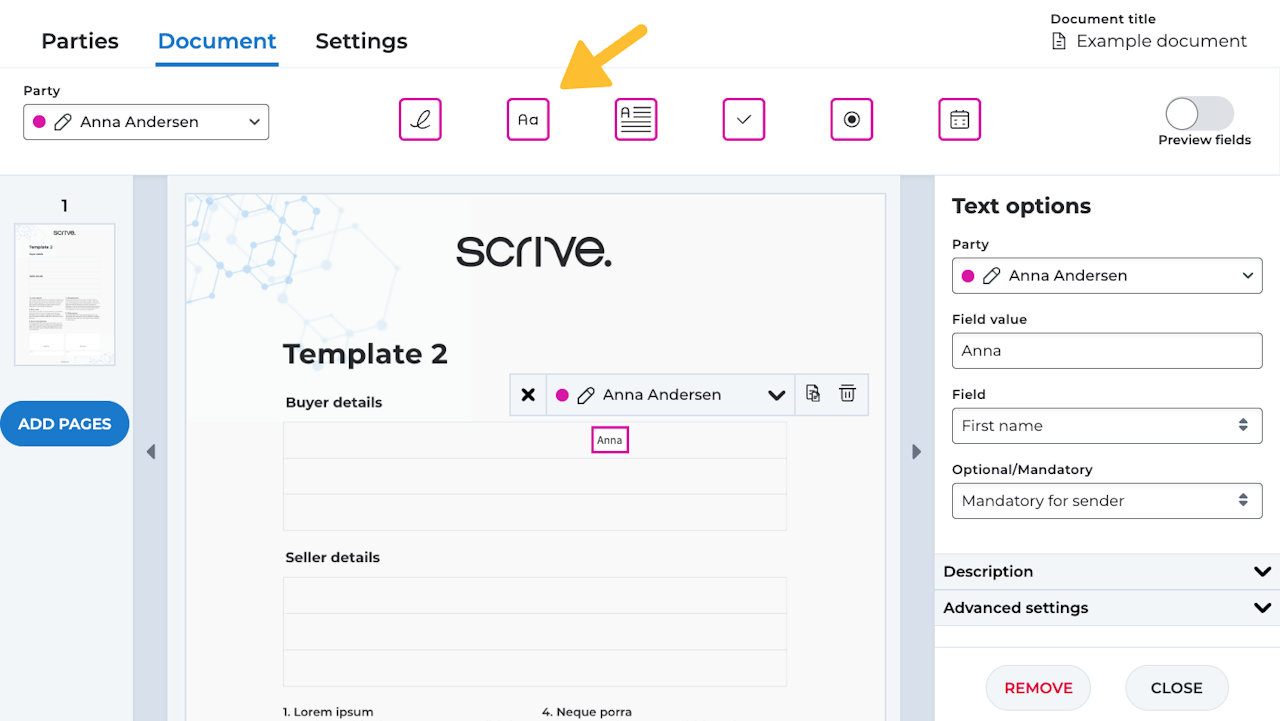
Upload a PDF under the Document tab.
Click on the Text field icon.
Move the text field by clicking and dragging it to the desired location.
When using QES as an authentication method:
To ensure all information fits correctly when the signatory fills in the field during the signing when using QES as an authentication method (via Scrive QES, Swisscom, Smart-ID or itsme®), make sure to resize the field accordingly. You can do this by dragging the bottom right corner of the field when adding it to your PDF.
If the content entered in a field exceeds the field's size, it will still be fully visible in the embedded evidence when the signed document is opened in a PDF reader, such as Adobe. However, the overflow may not be visibly displayed in the PDF upon a quick overview.

Text field settings
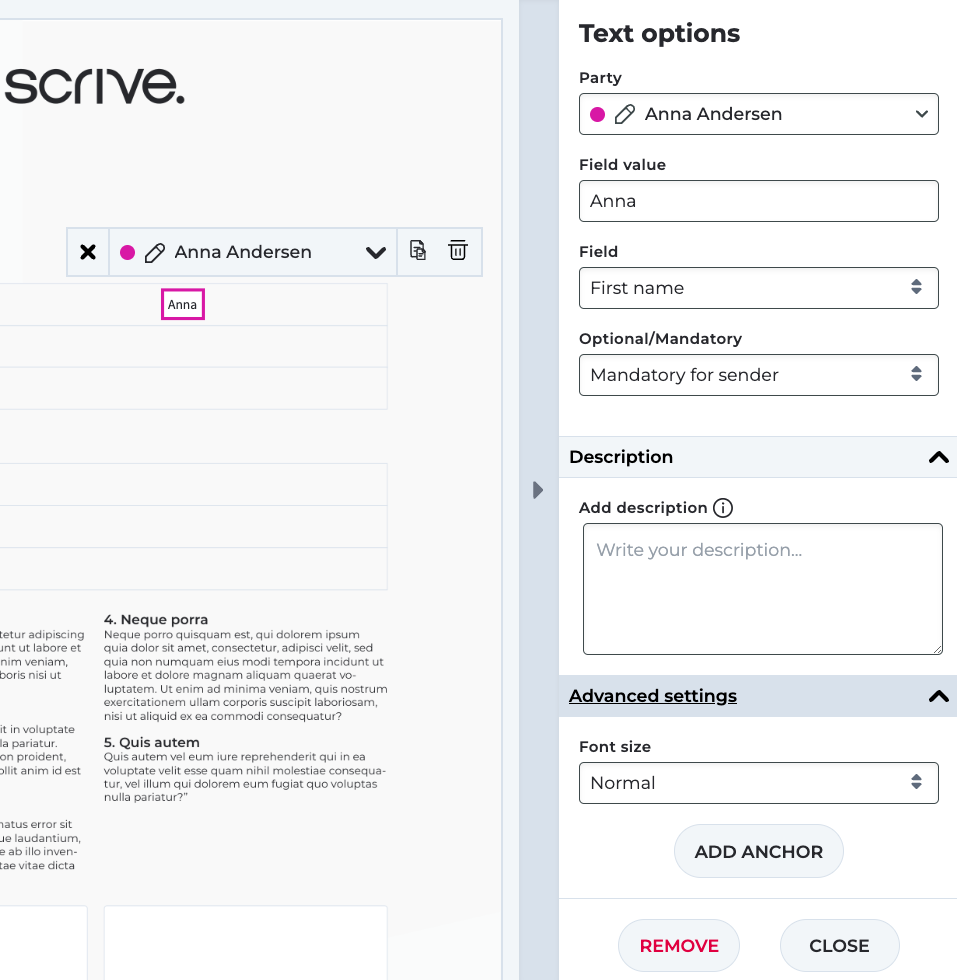
Party: Determine which party's information should populate this field.
Field name: Customise the displayed name for the field. Only visible if you add a new, custom, field.
Field value: Specify the displayed information. Leave it empty if you don't want to provide any information beforehand.
Field: Define the type of information to display or enter in this field.
Optional/Mandatory:
Optional: Completing this field is not required.
Mandatory for sender: You, as the initiator of the process, must provide data for this field before sending the document.
Mandatory for recipient: The selected party must complete this field to finish signing.
Additional settings:
Description (only visible if you have enabled the form on the Settings tab): Add some background info or guidelines to the signing party.
Font size (Advanced settings): Customise the text size.
Add anchor (Advanced settings): Dynamically position the field based on its relation to a text string.
Validation (for custom fields only): Ensure that information is entered in a specific format. Refer to the section below for more details on text validation.

Text field validation
When adding a custom Text field to your document, you can apply field validation to ensure that signatories enter information in a specific format. This is accomplished by using regular expressions (regex) in the Validation setting.
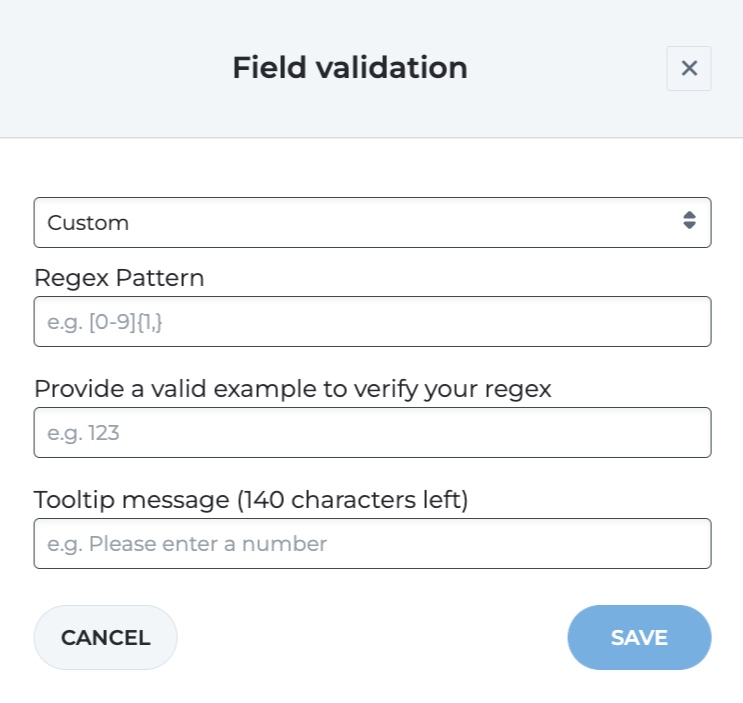
After adding a custom Text field to your document and opening the Validation settings, you can choose from pre-built regex patterns or create a custom one.
For example: If you want the signatory to enter their IBAN number, you can use a regex pattern to enforce the correct format.
Example regex for a Swedish IBAN number: SE\d{2}[ ]\d{4}[ ]\d{4}[ ]\d{4}[ ]\d{4}[ ]\d{4}|SE\d{22}
This regex means that the text input must:
Start with 'SE'
Be followed by 22 numbers.
Include spaces but no special characters.
When creating a custom regex, you'll also need to provide a valid example of the correct format, such as this example IBAN number: SE4550000000058398257466.
If the example does not correspond to the added regex, the field will turn red. You can choose to include a description, 'Tooltip message', to instruct signatories on what information to add.
When you're finished, click 'Save'.
